


Journey
I have designed functional web pages for myself which could connect two webpages, show marquee headline, show details about a particular image on another page, display the system date and time, display my current balance (manually entered) and a mother website to display all of my work. I started the journey, although fragmented and inconsistent, since 13 years of age.
I always enjoyed website development and that's the reason I did this work.
However they were not exercised with a career view, which is the picture now. The previous works definitely explored my creative abilities but something is different about the journey when anything is studied seriously (not forsaking the fun ofcourse!) with a timeframe in mind, to become better, super skilled, fluent, all to launch a fulfilling, wonderfully bright career. The second journey requires entering the discomfort zone quite often and that's the differentiating point.
The project begins
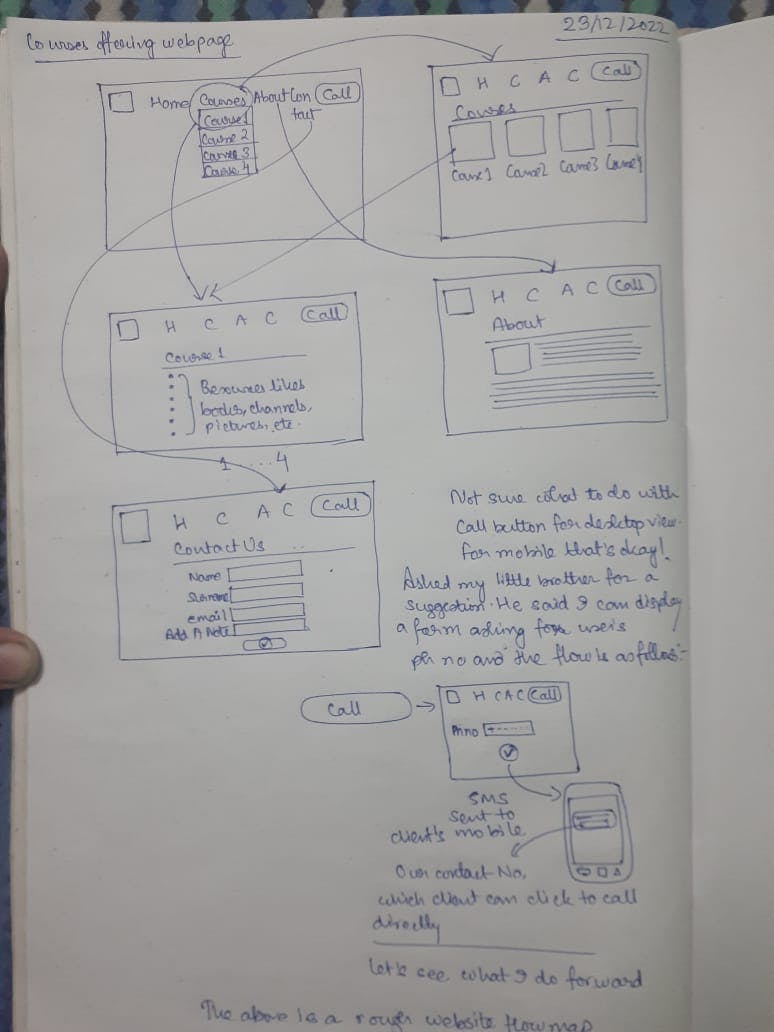
My first web development project is to create a website which offers the courses taught by my institution (not available on the internet! :D).
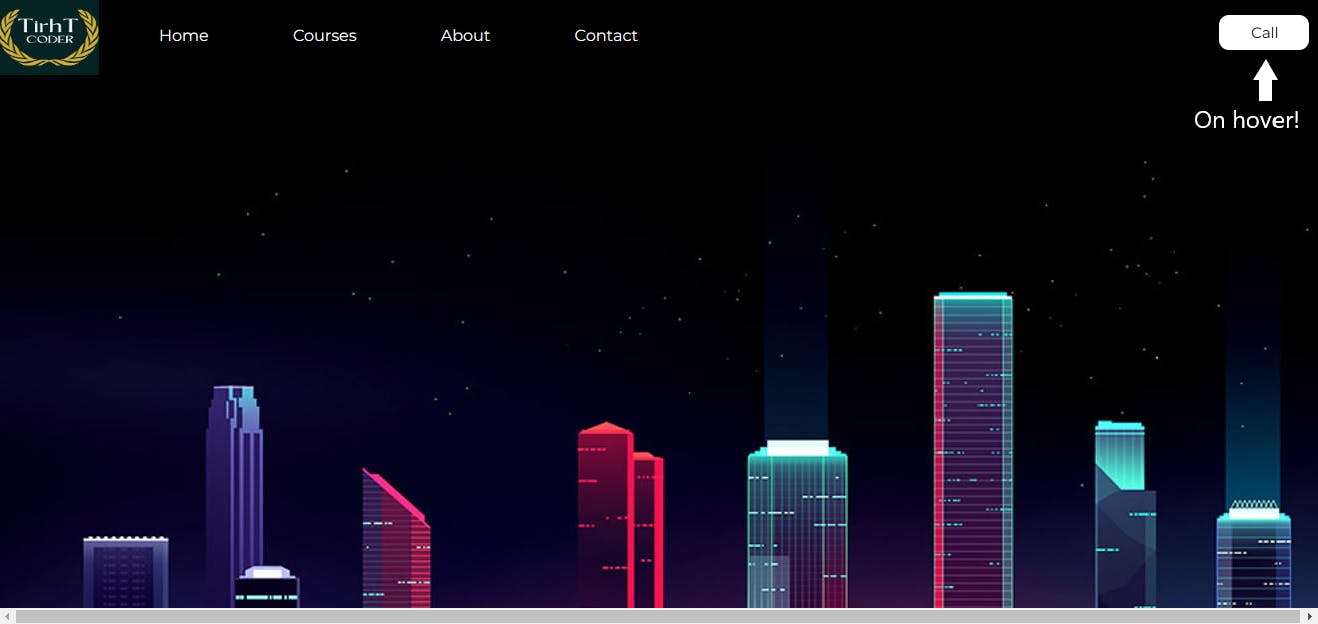
A. The initial picture of the website has these components included:
A good background
A navigation bar
Dropdown menus inside the navigation bar buttons
A button for the interested/curious user to contact us
A page displaying my courses in cards format
B. The principles of the website are:
Clean look
Ease of navigation
Intuitive
C. The technical components of the website are:
HTML
CSS
JavaScript (to be used later)
A brief on the HTML used
HTML stands for HyperText Markup Language and is the skeleton of a web page. It is used to provide a well-defined structure that can contain images, texts, links, etc.
Apart from the <DOCTYPE>, <html>, <head>, <meta> and <body> tags, the following were used:
<header> tag
<div> tag
<ul> tags
<li> tags
<a> tags
<button> tag
Some external stylesheets from https://fonts.googleapis.com/ were used within the HTML page to use appealing fonts. More on what stylesheet is, below.
A brief on the CSS used
CSS stands for Cascading Style Sheets and is the visual artist of the web page. It is used to provide graphical beauty to the HTML already used. Why it's called Cascading, I don't know but will surely find out soon!
There are 3 modes of styling:
Inline CSS - using CSS within HTML tags
Internal CSS - using CSS within the HTML page
External CSS - using CSS from a dedicated CSS file or from a website
In this project I used inline and external CSS modes.
CSS works by setting values to a gazillion properties of the HTML tags. The following properties of the HTML tags were adjusted:
background-color
border
display
font-family
font-size
font-weight
height
list-style
margin
padding
position
top
right
bottom
left
text-align
transition-duration
text-decoration
width
From the development aspect, CSS seems to be the one which is characteristically challenging. It is more challenging than HTML in the sense that styling often doesn't work the way it's meant to be, owing to the effects of many interacting (or conflicting!) properties of HTML tags.
You can follow my developing project here on GitHub.
It's cumbersome for the viewer to go through what nitty gritties are getting changed in each development milestone snapshot. That's why I will post the new features that are getting added in each milestone in my journey.
Conclusion
This brings us to the end of this article. I hope You liked reading through my journey and maybe also could relate with Yours' at some point in time. I would definitely love to know Your views. Thank You!